
If you’d quickly like to bring someone’s attention to a task you need completed, just assign it
Create a New Assignment
- Open a file from the Files page or from a project.
- Create a markup. Assignments are linked to a markup to provide visual context of the location.
- After creating the markup, click the Assignment icon in the property bar (highlighted in green in the image below).

This will open up the following panel on the right side of the screen.
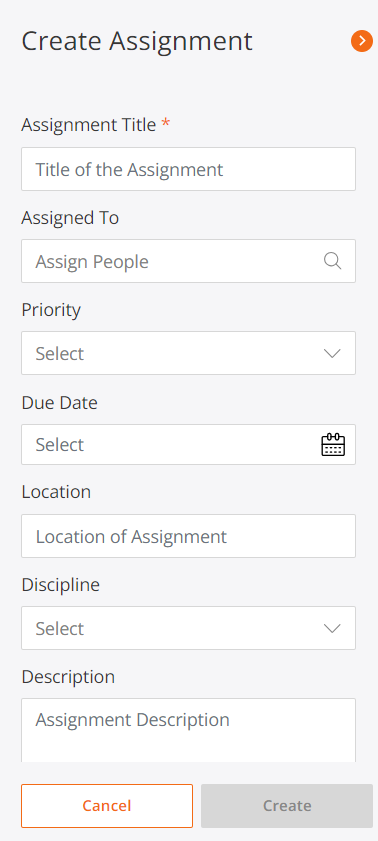
Let's go through the fields you'll see when creating an assignment:
- Assignment Title (required) - This is the main heading that will appear in assignment reports and notifications. Give it a clear, descriptive title.
- Assigned To - Here you'll select the person you're delegating this task to.
- Priority - Set the urgency level - low, medium, high, or hot. This helps the assignee prioritize their workload.
- Due Date - Pick the date you need this completed by. Don't worry, you can adjust it later if needed.
- Location - Provide additional clarification where the work needs to be done.
- Discipline - Use the dropdown to categorize what type of work this falls under - electrical, plumbing, HVAC, etc
- Description - This is wide open for you to give any extra details, notes, or instructions to fully explain the assignment.
Once you’ve filled in the fields you like, create the assignment by selecting Save.
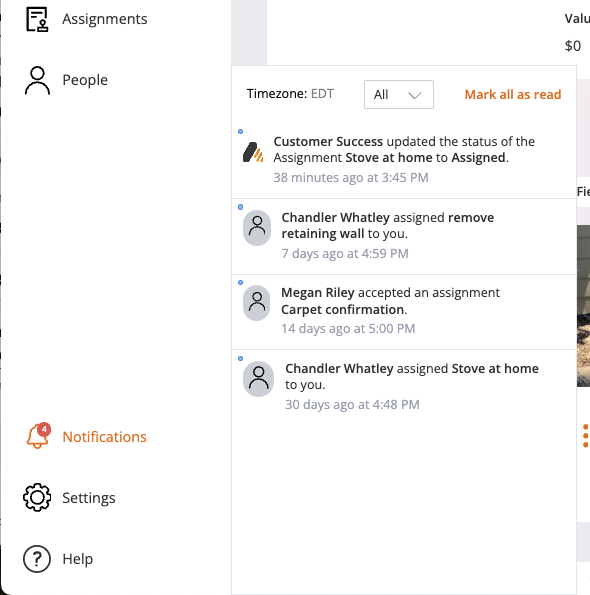
Individual(s) you added to the Assigned To field will receive an email notification and an in-app notification of the assignment. Learn more about ActiveDraft Notifications.
Reporting on Assignments
There are two ways to view and report on assignments - the dedicated Assignments page accessed from the left-hand menu, or within the specific file where an assignment is linked.
Assignments Page
On this page, you can filter the list of assignments using these tabs:
- Assigned to you - See all the tasks assigned to you across different projects and files.
- Created by you - Review the assignments you've delegated out to others. Follow their progress here.
- All assignments - This tab shows you every assignment within the workspace that you have access to based on your project/file permissions.
No matter which tab you're on, the assignments will be clearly listed out with key details so you can quickly scan their status and view details. Powerful reporting made simple!
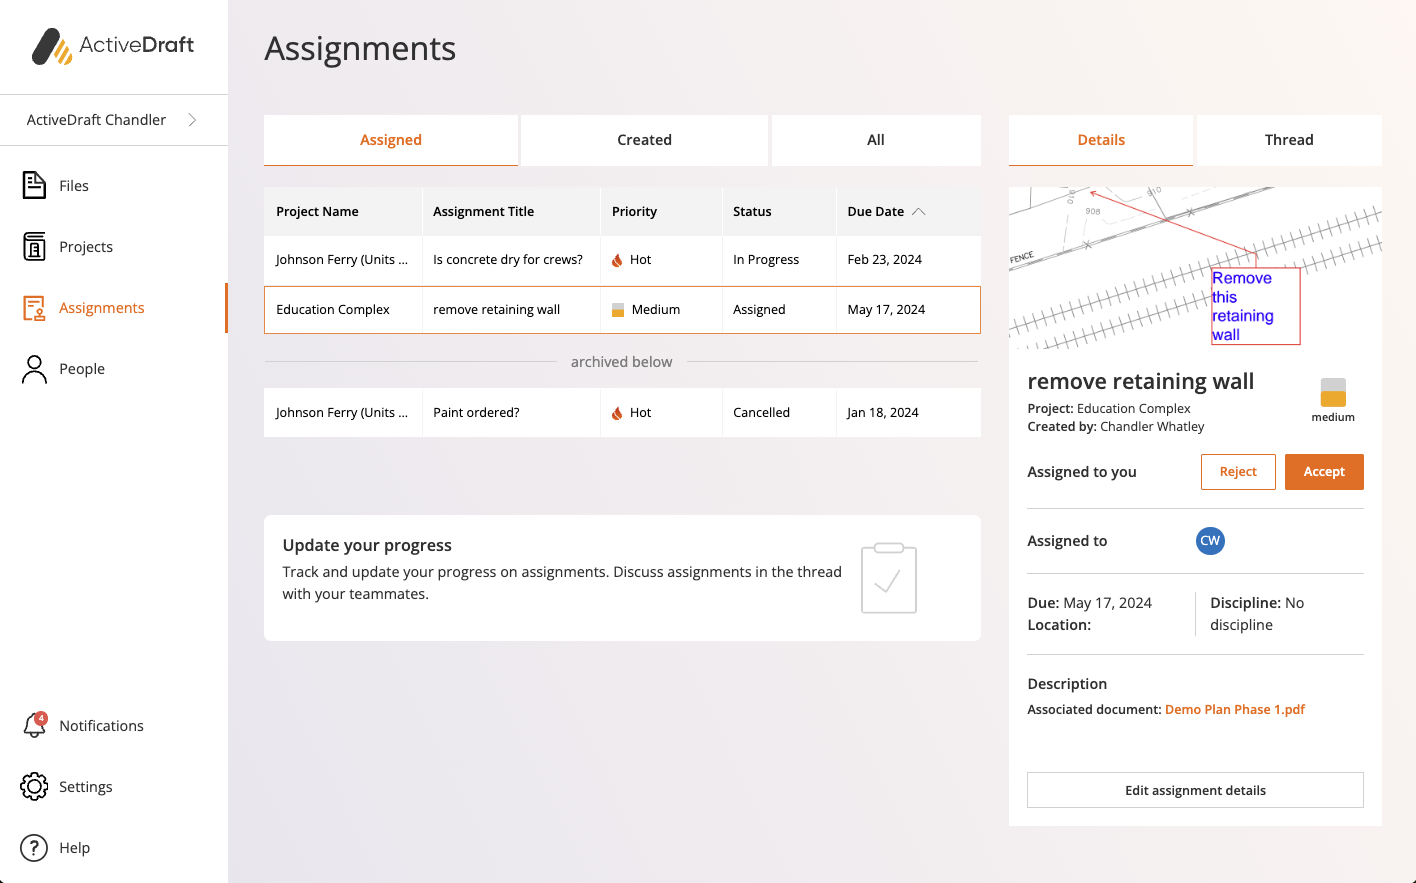
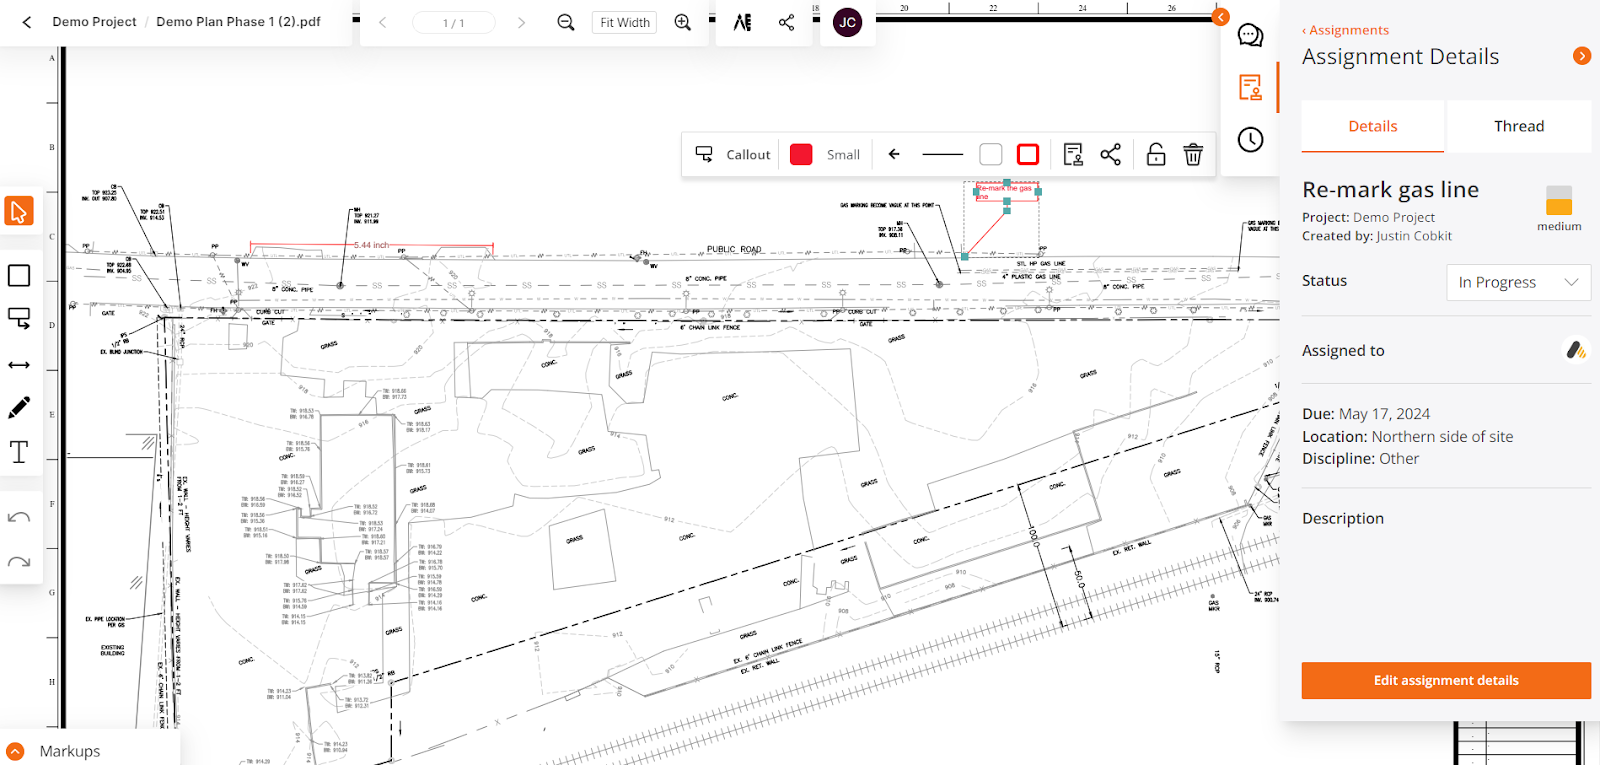
Updating Assignment Details
Need to modify an assignment? Click Edit assignment details at the bottom - but only if you're the creator, the assignee, or have owner/contributor access to the linked file.
Jumping to the Assignment Markup
While viewing the Assignments page, you can quickly jump to the actual markup location within a file by clicking the thumbnail image for that assignment. Instantly, you're there!
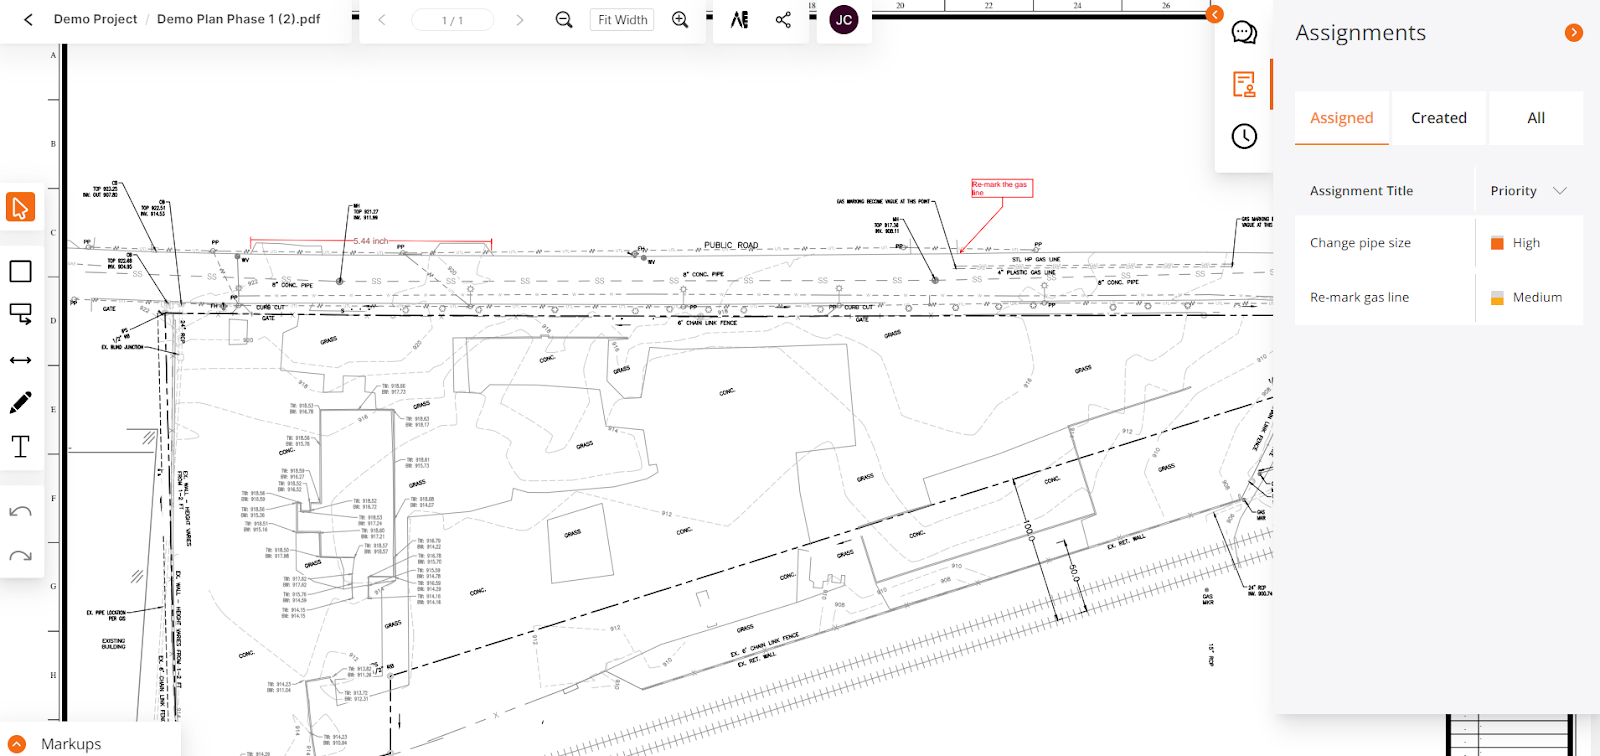
View Assignments in the File
Similar to the assignments page, once you open the assignments panel you have the option to filter all assignments in the file based on assigned to you, created by you, or all assignments.
If you’d like to see details on a particular assignment, simply click into that assignment.
The Experience of an Assignee
When an individual is assigned an assignment, they will receive an email notification and in-app notification.
Once they click into the notification, they’ll be taken to that assignment in the assignments page and be prompted to either Accept the assignment or to Reject it.

Rejecting an assignment
In the event an assignee rejects an assignment, it will trigger a few key actions:
- They will be automatically removed from the Assigned To field.
- The assignment disappears from the rejector's Assigned tab view.
- The original assigner receives an email and in-app notification alerting them of the rejection.
- The assigner, along with anyone else having access, can then reassign the task to a different individual.
- The assignment status updates to Unassigned and appears under the All assignments tab until reassigned.
This seamless rejection process allows assignments to be reallocated efficiently while keeping all relevant parties informed.
Accepting an assignment
In the event an assignee accepts the assignment, it will trigger a few key actions:
- The Assignment will remain in their Assigned tab
- They can now select the Status of the Assignment to keep others informed on the progress of the assignment
- They can edit assignment details
Tracking Assignment Progress
To keep everyone on the same page, assignments can have one of five statuses indicating where they stand:
- Blocked - This flags that an issue or impediment is preventing the assignee from moving forward.
- Completed - The task is officially done and dusted!
- In Progress - Work is actively underway on the assignment. This status kicks in automatically when an assignment is accepted.
- Ready for Review - The assigned work has been completed and is ready for verification by others.
- Canceled - This assignment is no longer required and has been called off.
These clear-cut statuses provide transparency into assignment progress across your projects and teams.
Need more support? We'd love to help! Email us at support@activedraft.com