ActiveDraft allows users with the role of Admin or Manager to create and define projects in order to organize drawings and other related work.
Create a New Project
After logging into ActiveDraft select the Projects link in the left column and click the Add a new project button. The Add a new project form will display.

The Project Name and Project Leader fields are required. All other fields are optional.
The Project Type field is a free form text field.
The Client field is a free form text field. The Phase field is a free form text field.
The Start Date field will display a calendar to allow users to define a start date for the project.
The End Date field will display a calendar to allow users to define an end date for the project. The end date must be after the start date.
The Value field is a numeric field to store the value of the project.
The Description field is a free form text field.
When complete select Save.
Update Your Project Settings
After you create a new project, you will return to the Project Page. Refresh your browser to see your new project on the page. Click on the Project Panel to access the Project Settings page. On this page you can modify the Project Settings by clicking the 3 vertical dots on the upper right and selecting Edit Project.
The Edit project form will display

The Project Name and Project Leader fields are required. All other fields are optional.
The Project Type field is a free form text field.
The Client field is a free form text field.
The Phase field is a free form text field.
The Start Date field will display a calendar to allow users to define a start date for the project.
The End Date field will display a calendar to allow users to define an end date for the project. The end date must be after the start date.
The Partner Companies field can be populated with any of the Companies that are defined in ActiveDraft.
The Value field is a numeric field to store the value of the project.
The Description field is a free form text field.
When complete select Save.
Adding Users to a Project
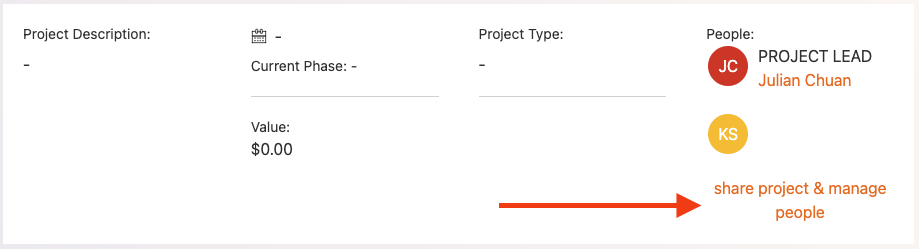
Once you have created a Project in your Workspace, click on it to open the Project. At the top you’ll see share project & manage people.
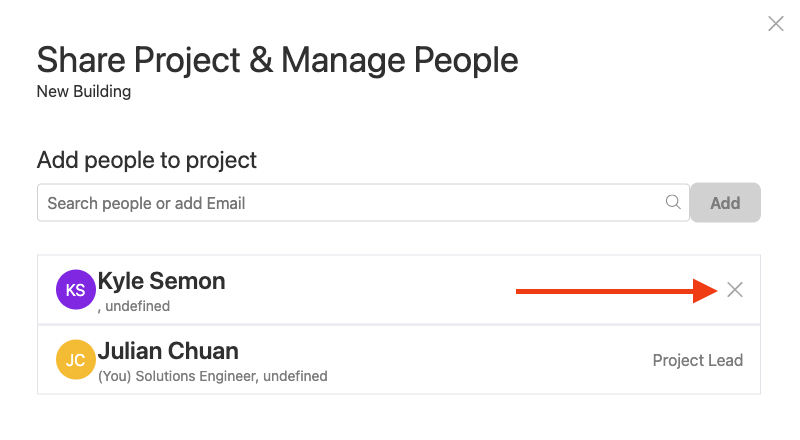
Clicking here opens up a new window displaying all current Project Members. You can also search and add users from your Workspace to this Project.

Removing Users from a Project
Removing users from a Project follows a similar workflow to adding them. Begin by navigating to the specific Project within your Workspace. Upon opening the Project, locate share project & manage people. Clicking on this option opens the same window as before.
Next to each user, you'll find a X. A single click will remove the user from the Project. It's important to note that this action only removes the user from the specific Project, not from the entire Workspace. The same user can later be re-added to this Project or added to another Project. Removing a user from one Project does not affect their participation in other Projects.